BLEASS Fusion is a unique and powerful waveshaping tool that harnesses the limitless flexibility of wavetables to unleash sumptuously smooth saturations, disgracefully dirty distortions, and maximally mad mashups.
BLEASS has designed Fusion to be one of the – if not the – most versatile and adaptable distortion and saturation plugins available today, able to completely change its entire tone and character in an instant. The magic comes from the way in which wavetables define the sonic results of processing, and so empower the plugin with the versatility to satisfy your every sonically-destructive whim.
Whether you want to spice-up your audio with the lightest sprinkle of sizzle, smother it in a luxuriant fluffy blanket, or shatter it into fractured shards, BLEASS Fusion provides the perfect waveshaping weaponry for the job. And should you find that the 58 included wavetables don’t quite fulfil your distortion dreams, importing your own custom wavetables is simply a matter of dropping a file into a folder.
A pair of multi-mode resonant filters allow BLEASS Fusion to focus its fury on particular frequencies, or can be used to tame its more extreme excesses. And with a full complement of modulators that add movement and dynamism to your sound, a huge palette of expressive, rhythmic and evolving distortions are just waiting to be explored.
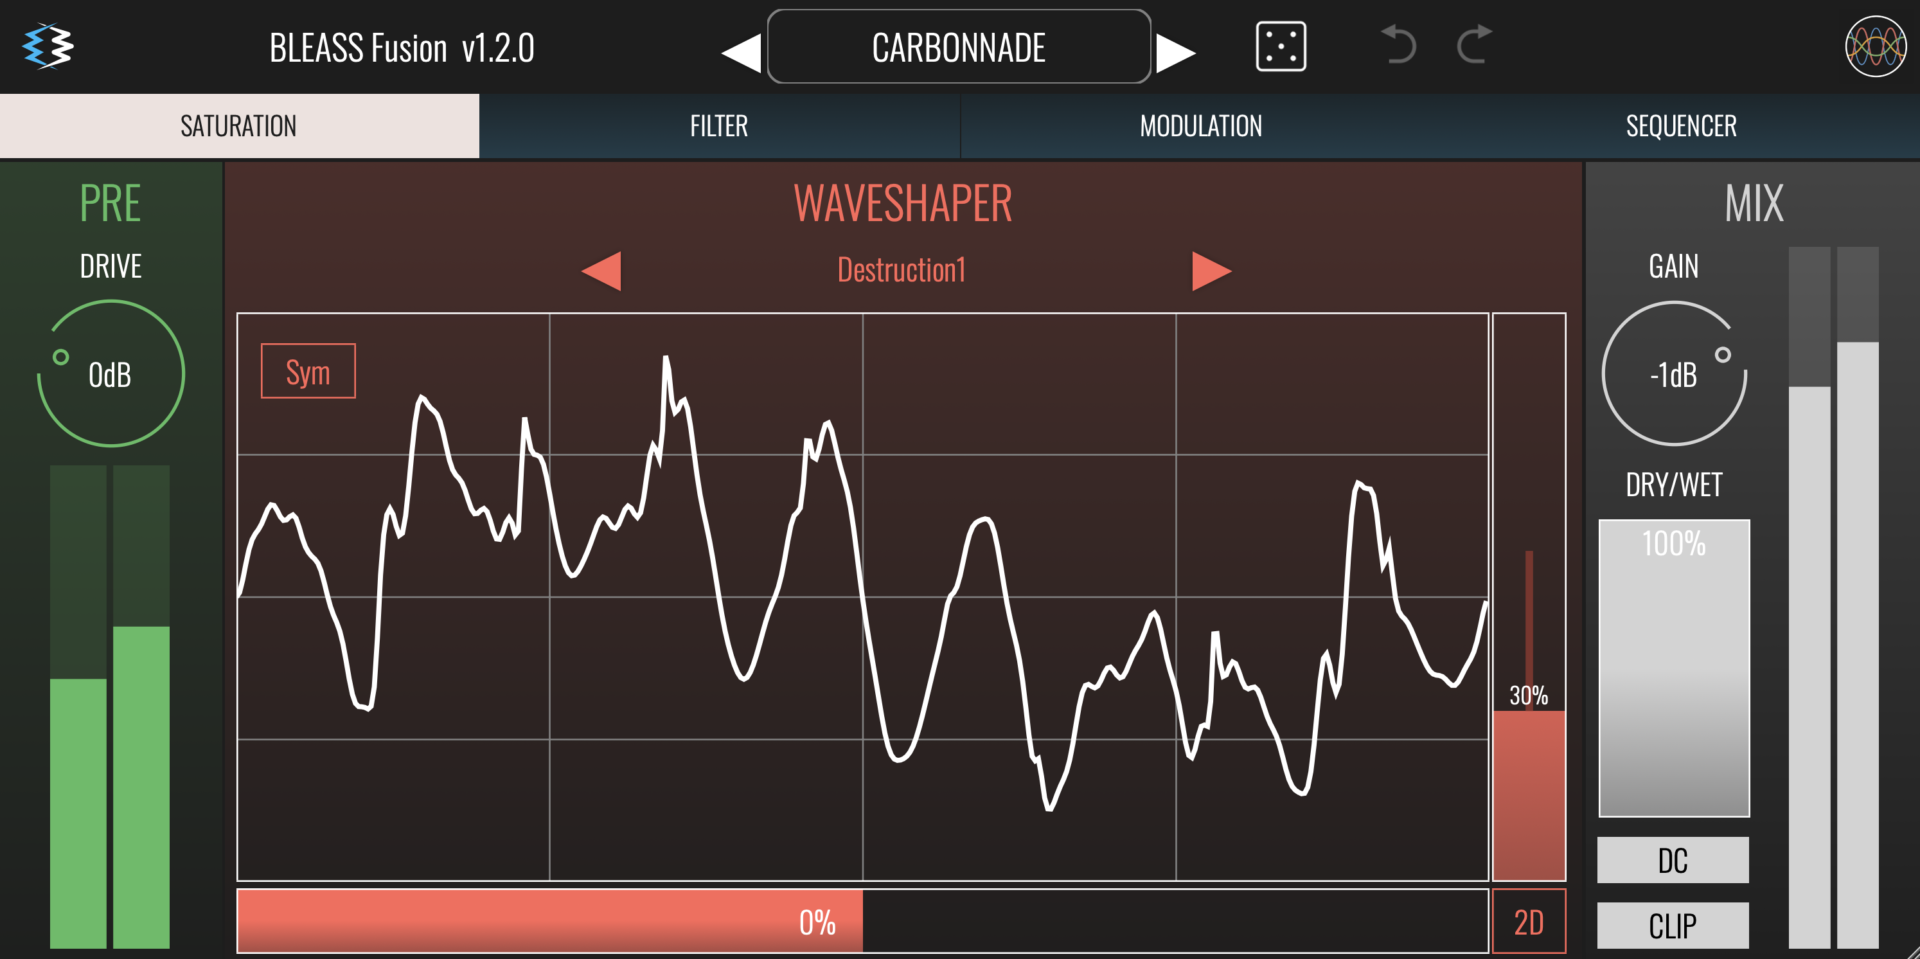
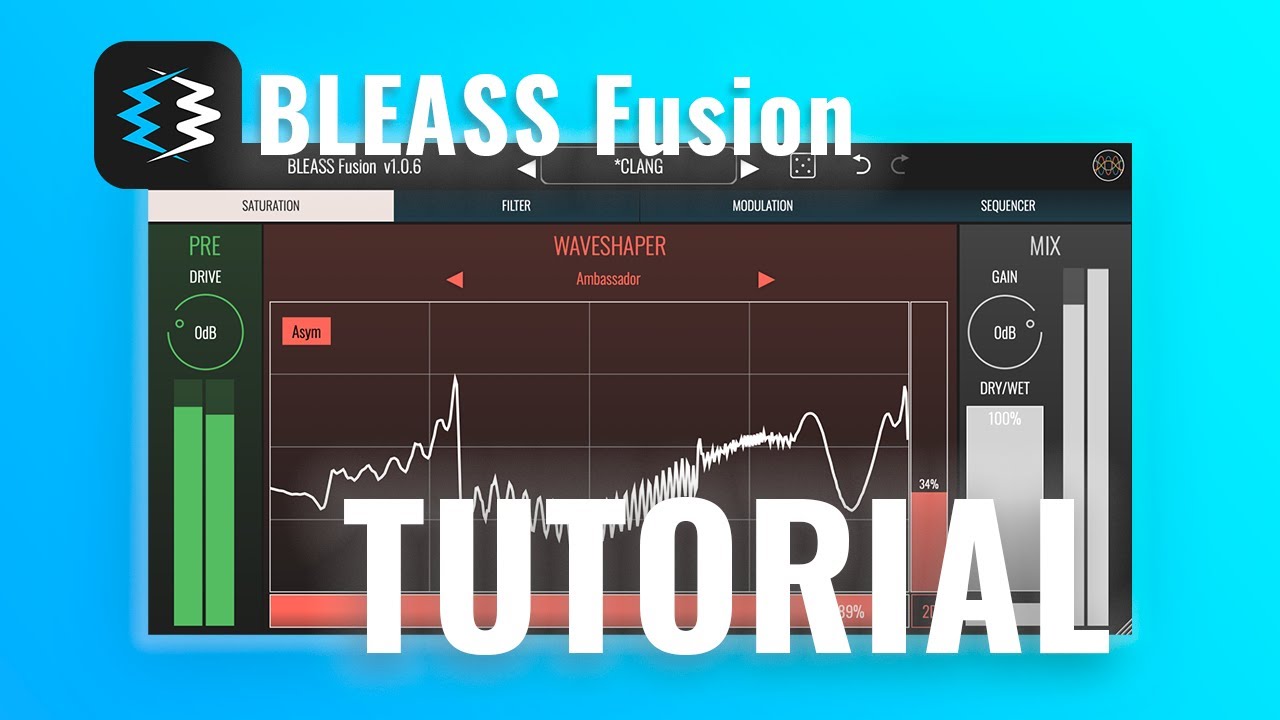
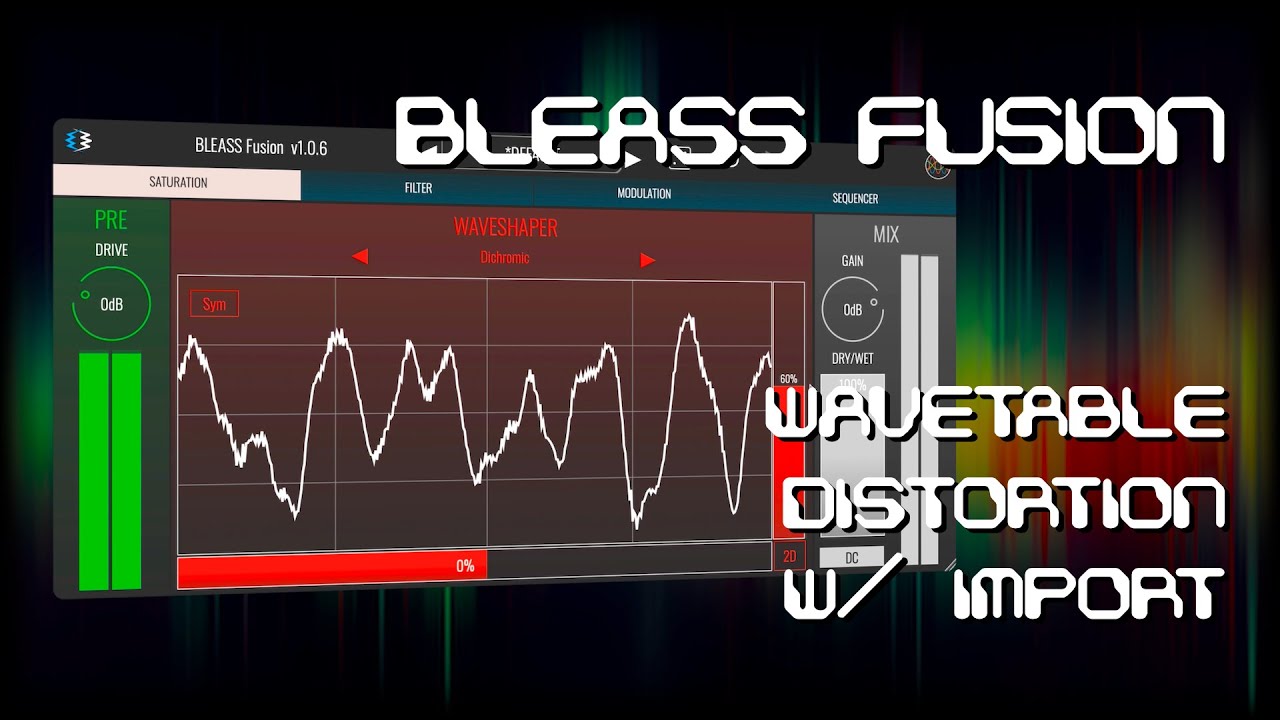
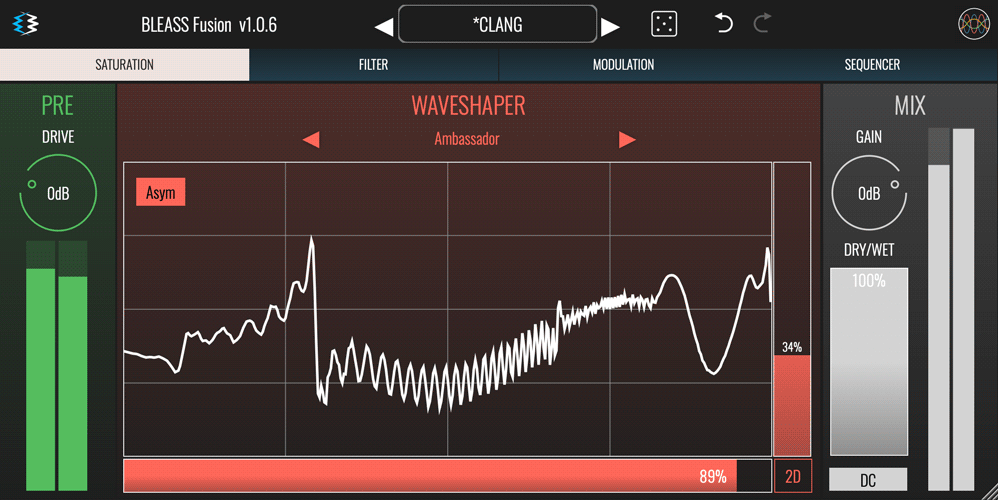
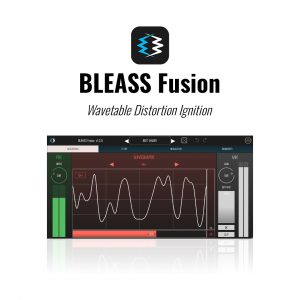
SATURATION TAB
BLEASS Fusion’s wavetable saturation works as follows:
- The input signal is hard clipped at 0dB, which has the effect of holding the signal between +0dB and -0dB.
- When the input is at -0dB, the output is the furthest point to the left of the wavetable.
- When the input is at +0dB, the output is the furthest point to the right of the wavetable.
- When the input decreases in volume, the output gets closer and closer to the centre of the wavetable.
The Saturation tab houses all of the controls for the wavetable engine along with master input and output controls.
PRE
Drive: Sets the input signal level and can introduce analogue-style overdrive saturation into the sound. The Drive setting also controls the strength of signal passed to the waveshaper, and so impacts on the overall amount of distortion that will be generated.
Meter: Peak meter visualising the signal level after it has passed through the Drive stage.
WAVESHAPER
Wavetable Selector: Click the wavetable name to open a menu of 58 available wavetables. The left and right arrows can be used to step through the available wavetables.
Importing Custom Wavetables: You can import your own wavetables for use in BLEASS Fusion. Wavetables must have frame size of 2048 samples and contain a maximum of 256 frames. To import a wavetable :
On Mac or Windows, drop the wavetable audio file into the folder: [user folder]/Documents/BLEASS/BLEASS Fusion/Tables/
On iOS, copy the wavetable audio file into the iCloud folder BLEASS Fusion/Tables/
Restart BLEASS Fusion
Your imported wavetable(s) will be shown in the USER section of Fusion’s Wavetable menu.
Wavetable Graph: In 2D mode, the graph shows the shape of the waveform that is currently being extracted from the chosen wavetable. In 3D mode, multiple waveforms from within the wavetable are shown, with the currently active waveform overlaid in white.
Wavetable Position (Vertical Slider): Use the vertical slider to set the wavetable position from which the waveform will be extracted.
Wavetable Fold (Horizontal Slider): Use the horizontal slider to set the wavetable’s fold. Fold modifies the shape of the wavetable’s waveforms, condensing the shape of the waveform without changing the overall wavelength. Conceptually, this is similar to adjusting the pulse width of a pulse wave oscillator.
Sym/Asym: Determines whether folding occurs symmetrically around the centre of the wavetable, or asymmetrically from the left to right of the wavetable.
MIX
Gain: Sets the output signal level.
Dry/Wet: Sets the balance between the unaffected and effected signal. At 0% only the “dry” unaffected signal will be heard; at 100% only the “wet” effected signal will be heard; at any other setting a blend of the two signals will be heard.
DC: Engages a DC Offset Removal processor to remove any signal offset that may result from the waveshaping process.
Clip: Engages a simple limiter to avoid peaks
Meter: Peak meter visualising the output signal level.
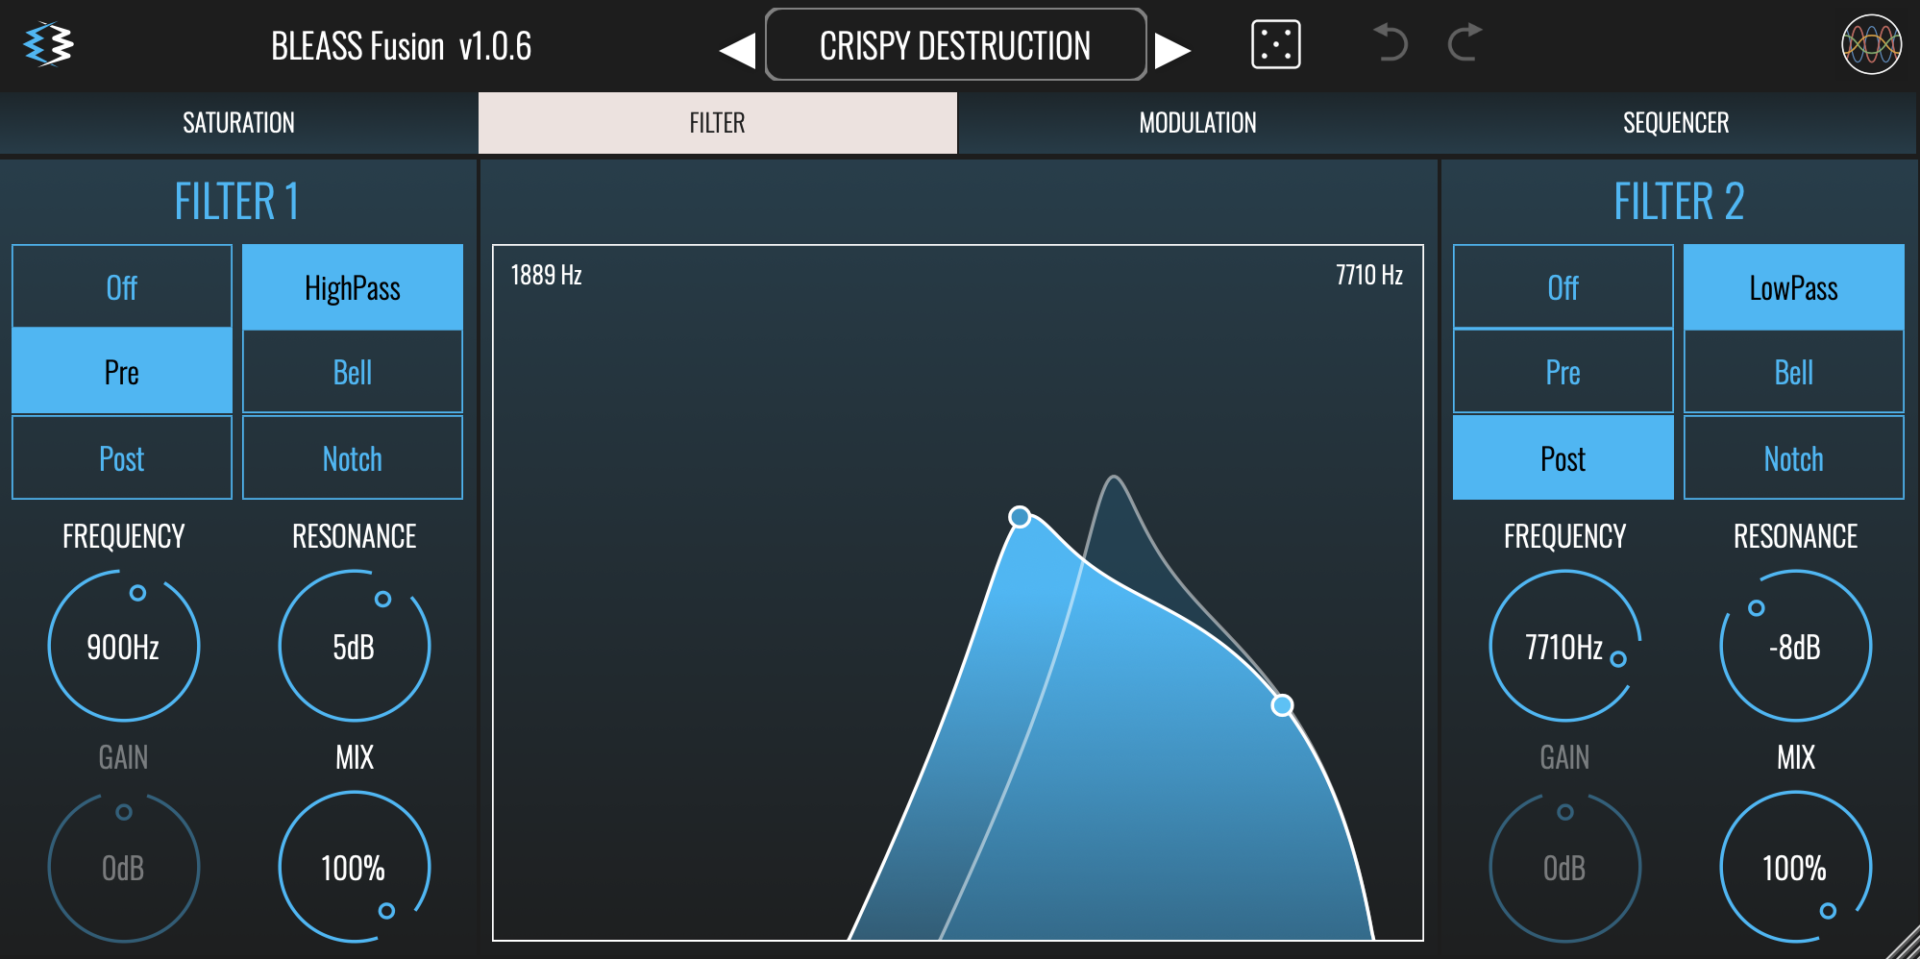
FILTER TAB
BLEASS Fusion incorporates a pair of resonant multi-mode filters for sculpting and shaping the sound.
FILTER 1 / FILTER 2
Filter Position (OFF / PRE / POST): Determines whether a filter is enabled, and whether it is positioned before (PRE) or after (POST) the waveshaper.
- When in PRE position, the filter can be used to impact the way in which the waveshaper responds to the signal.
- When in POST position, the filter allows the tone of the distortion to be shaped and sculpted.
Filter Type: Determines the type of filtering that will be used.
- High-Pass (FILTER 1 only) prevents frequencies below the filter’s frequency value from passing
- Low-Pass (FILTER 2 only) prevents frequencies above the filter’s frequency value from passing
- Bell cuts or boosts frequencies that centre around the filter’s frequency value, much like a parametric EQ band.
- Notch removes frequencies that centre around the filter’s frequency value
Frequency: Sets the filter’s cutoff / centre frequency. You can also adjust the frequency by dragging the filter’s node on the graph left or right.
Resonance: With high- and low-pass filters, positive resonance values create a boost to frequencies that lie around the cutoff frequency, and negative values soften the angle of the filter’s cutoff. With Bell and Notch filters, the resonance value determines the bandwidth of the bell / notch. You can also adjust the resonance by dragging the filter’s node on the graph up or down.
Gain (Bell filter only): Sets how much boost or cut to apply to frequencies that lie around the filter’s frequency.
Mix: Sets the mix balance between the filtered and unfiltered signal. At 0% only the unfiltered signal will pass; at 100% only the filtered signal will pass; at any other setting a blend of the two signals will pass.
Filter Graph: Visualises the current settings of both filters, and provides an alternate method of modifying the filters’ settings. Each filter has a node on the graph; drag a node left-and-right to adjust the corresponding filter’s frequency, and up-and-down to modify the corresponding filter’s resonance / bandwidth.
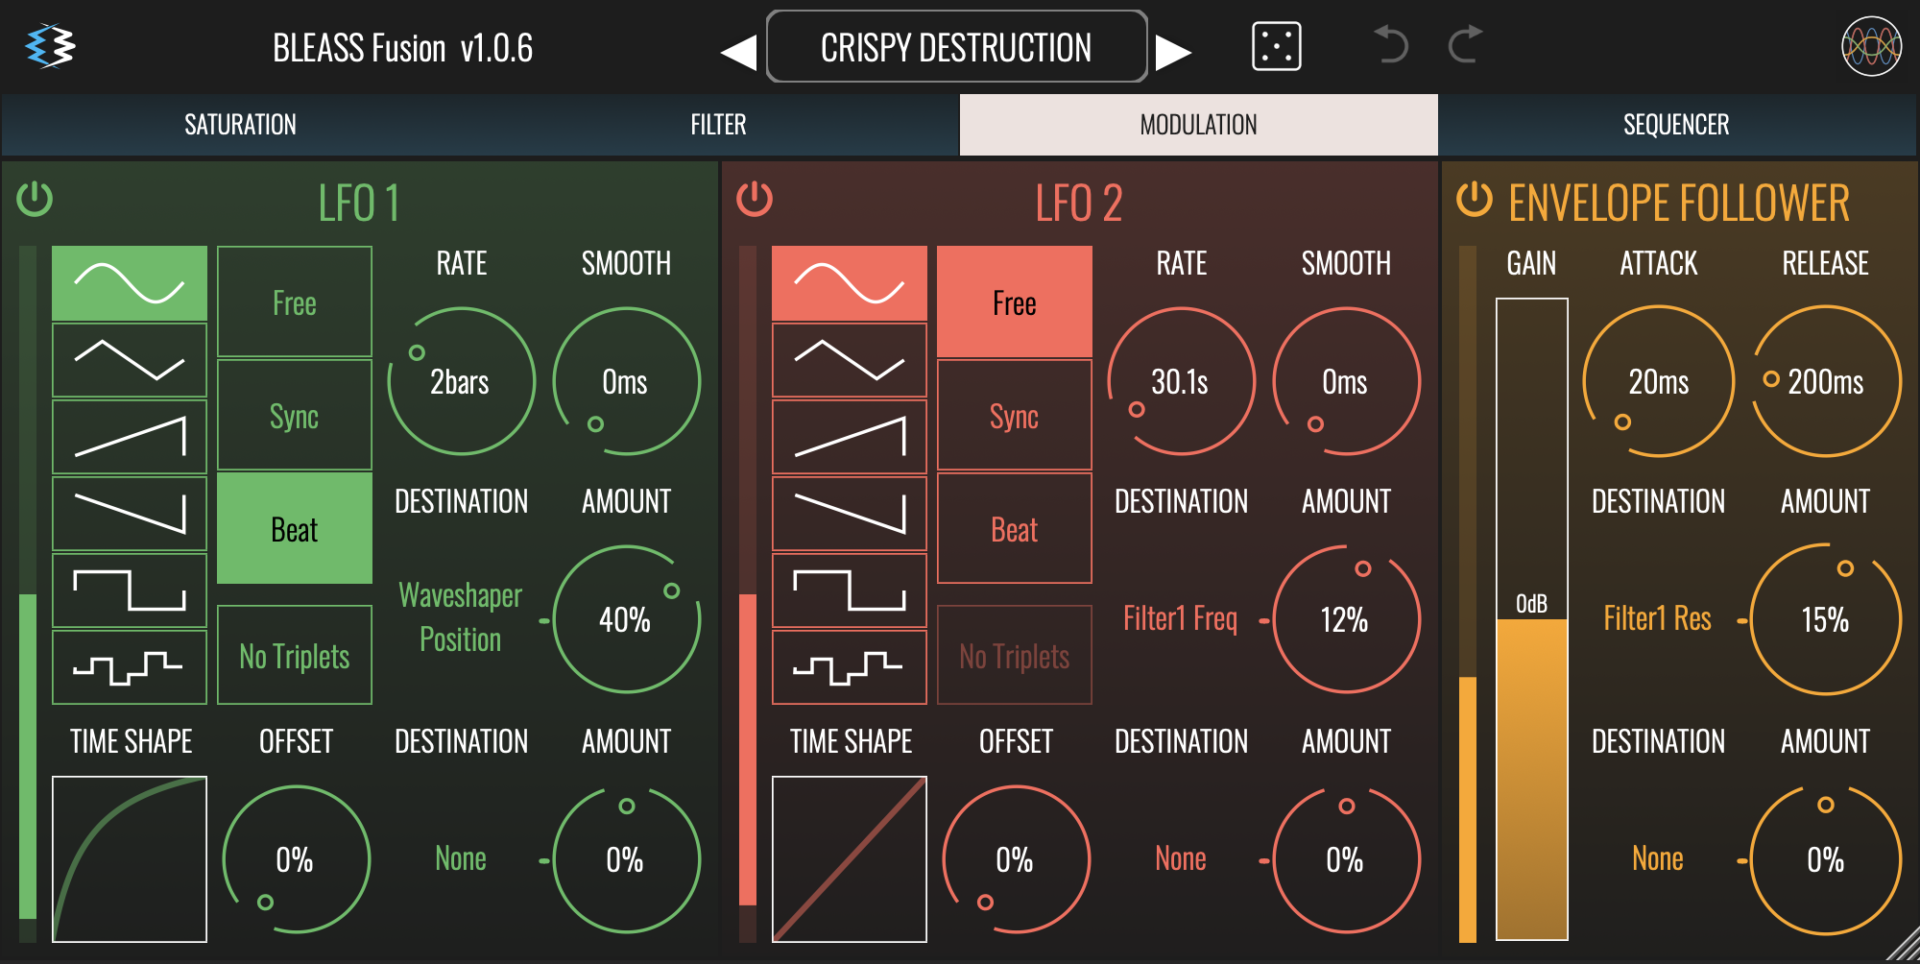
MODULATION TAB
LFO 1 / LFO 2
On/Off Button: Enables or disables the LFO.
Shape: Sets the shape of the LFO waveform. Choose from sine, triangle, sawtooth up, sawtooth down, square and sample-and-hold.
Time Shape: The Time Shape graph alters the rate at which the LFO moves through its waveform cycle. When the graph shows a straight line no time shaping will be applied. Dragging the line introduces a curve that illustrates how the LFO’s timing will change through each cycle of the waveform. Double click the graph to reset the time shape. The results of the Time Shape are clearly visible in the LFO’s visualisation.
Sync Mode: Choose the LFO’s synchronisation mode.
- FREE uses internal timing for the LFO.
- SYNC synchronises the LFO to the host DAW’s tempo.
- BEAT synchronises the LFO to the host DAW’s tempo and bar position.
No Triplets: When enabled, any triplet value selected for the LFO Rate (1/3, 1/6 etc.) will be ignored. Not available in FREE sync mode.
Offset: Offsets the start point of the LFO’s cycle, in effect shifting the LFO’s phase with respect to the chosen timing or DAW tempo.
Rate: Sets the time taken for the LFO to complete one cycle of its waveform. The Rate is expressed as milliseconds and seconds when in FREE sync mode, otherwise it is expressed in terms of note length.
Smooth: The Smooth parameter imposes a maximum rate of change on the LFO’s output values. This means that, for example, when a sawtooth up LFO wave reaches the end of a cycle the LFO value ramps down to the minimum rather than immediately dropping to the minimum, thereby smoothing-out the sudden value change. This can also have the effect of damping the magnitude of the LFO. The results of smoothing are clearly visible in the LFO’s visualisation.
Destination (x2): Specifies a target parameter that will be modulated by the LFO.
Amount (x2): Scales the strength of the LFO’s impact on the assigned destination parameter. Negative values will reverse the polarity of the modulation – in other words, when the LFO is rising the destination parameter’s value will be reduced.
ENVELOPE FOLLOWER
On/Off Button: Enables or disables the Envelope Follower.
Gain: Adjusts the volume level of the signal that’s fed to the Envelope Follower’s detector. This affects the sensitivity of the Envelope Follower, as well as determining the maximum strength of its output.
Attack: Determines the attack time of the envelope generated by the Envelope Follower.
Release: Determines the falloff time of the envelope generated by the Envelope Follower.
Destination (x2): Specifies a target parameter that will be modulated by the Envelope Follower.
Amount (x2): Scales the strength of the Envelope Follower’s impact on the assigned destination parameter. Negative values will reverse the polarity of the modulation – in other words, when the Envelope Follower’s value is rising the destination parameter’s value will be reduced.
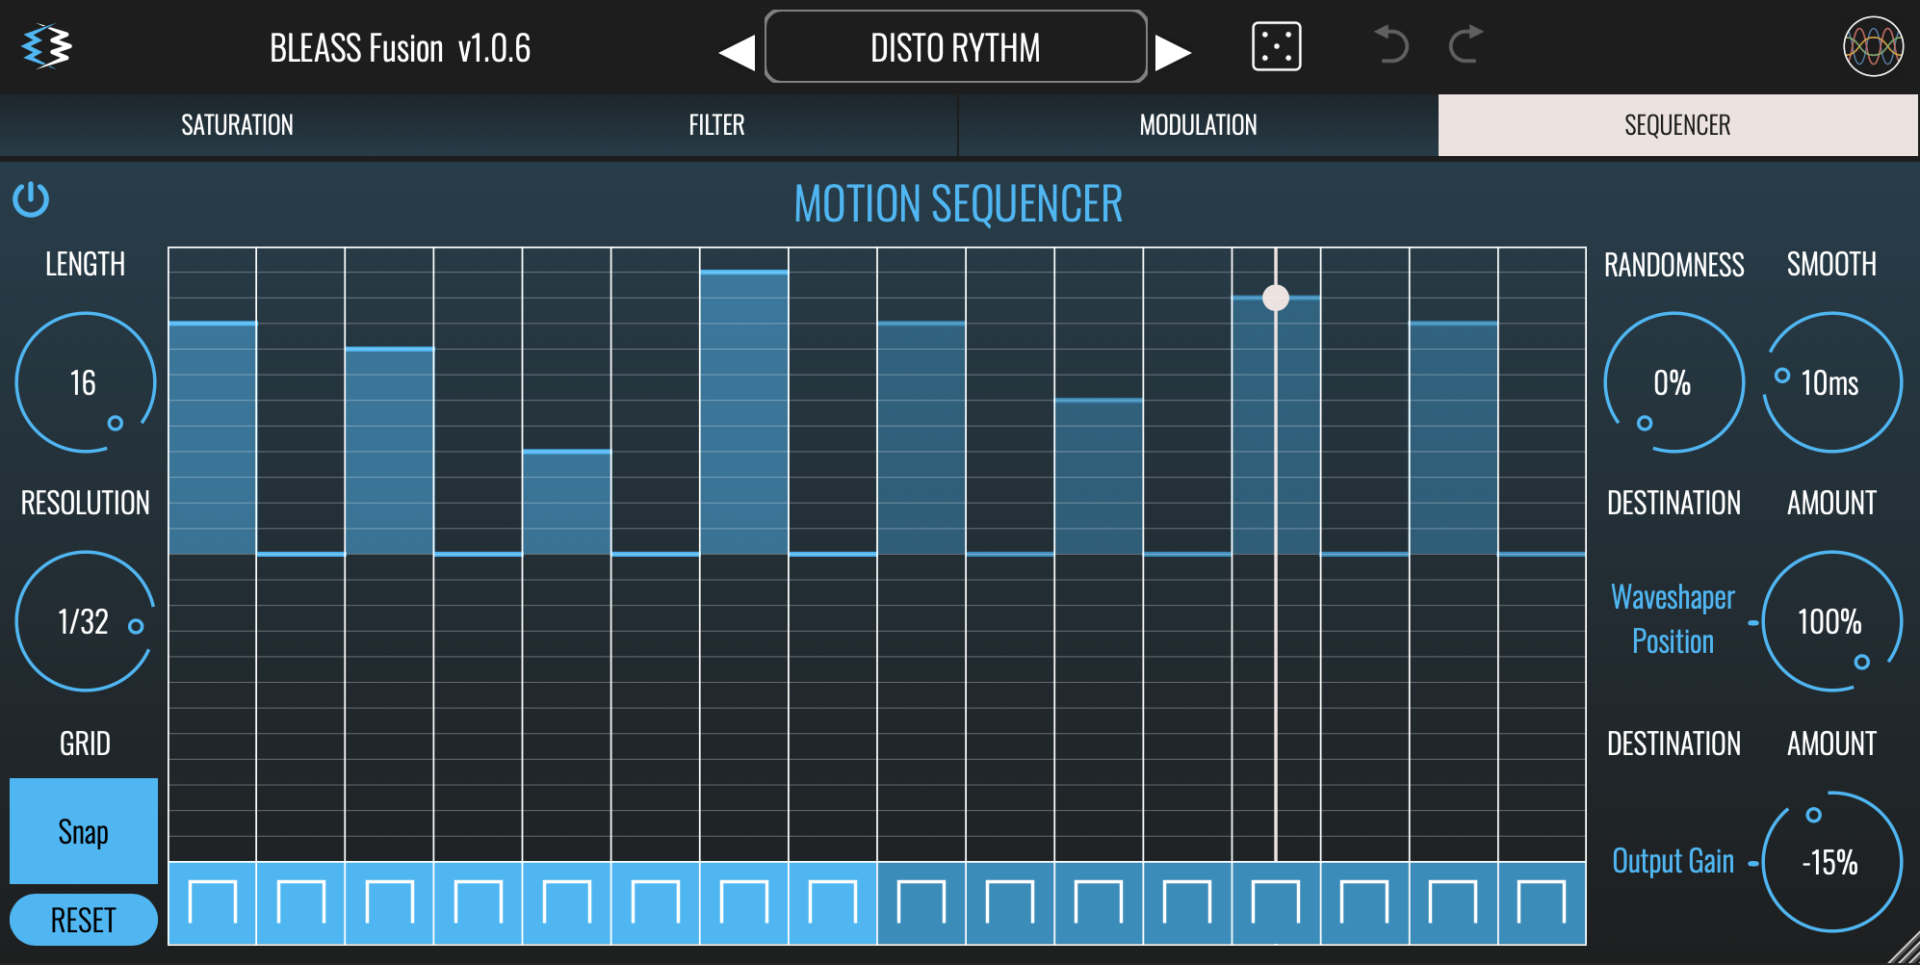
MOTION SEQUENCER TAB
The Motion Sequencer allows patterns of values to be sequenced and then used to modulate up to two of BLEASS Fusion’s parameters. Note that the sequencer only runs when the host DAW is playing.
MOTION SEQUENCER
On/Off Button: Enables or disables the Motion Sequencer.
Length: Specifies the number of steps within the sequence.
Resolution: Sets the length of each Motion Sequencer step with respect to the host DAW’s tempo.
Grid: When Snap ON is selected, values you set in the Motion Sequencer will snap to the vertical grid. When Snap OFF is selected, any value can be set within the sequence.
Reset: Resets the Motion Sequencer’s steps to their default state.
Motion Sequencer Grid: Click on the sequencer grid to set a value for the corresponding sequencer step. You can also right-click on the grid to open a popup where you can type in a value for the step (1 = maximum; 0.5 = middle; 0 = minimum).
Step Shape Buttons: The buttons below each step control the step shape. Clicking the button will cycle through the available step types; alternatively, right clicking on a button opens a popup in which you can enter the number that corresponds with the desired step type:
0 – STEP: Outputs a constant value for the duration of the step.
1 – RAMP: The step’s value will change from its initial value to its ending value over the duration of the step. The ending value is determined by the subsequent step.
2 – UP: The step’s value will change from an initial value that you set to the maximum value over the duration of the step.
3 – DOWN: The step’s value will change from the maximum value to an ending value that you set, over the duration of the step.
4 – SMOOTH RAMP: Similar to RAMP, but with smoothing of the value transitions between steps.
Randomness: Introduces a random element to the value of the current step. The higher the Randomness setting, the larger the possible deviation from the step’s programmed value.
Smooth: The Smooth parameter imposes a maximum rate of change to the values generated by the Motion Sequencer. This means that, for example, when stepping from a high value to a low value, the actual output value of the Motion Sequencer will ramp smoothly toward the lower value rather than jumping to it immediately. This can also have the effect of damping the magnitude of the Motion Sequencer’s output. The results of smoothing are clearly shown by the marker that moves across the Motion Sequencer as it plays.
Destination (x2): Specifies a target parameter that will be modulated by the Motion Sequencer.
Amount (x2): Scales the strength of the Motion Sequencer’s impact on the corresponding destination parameter. Negative values will reverse the polarity of the modulation.
GLOBAL FEATURES
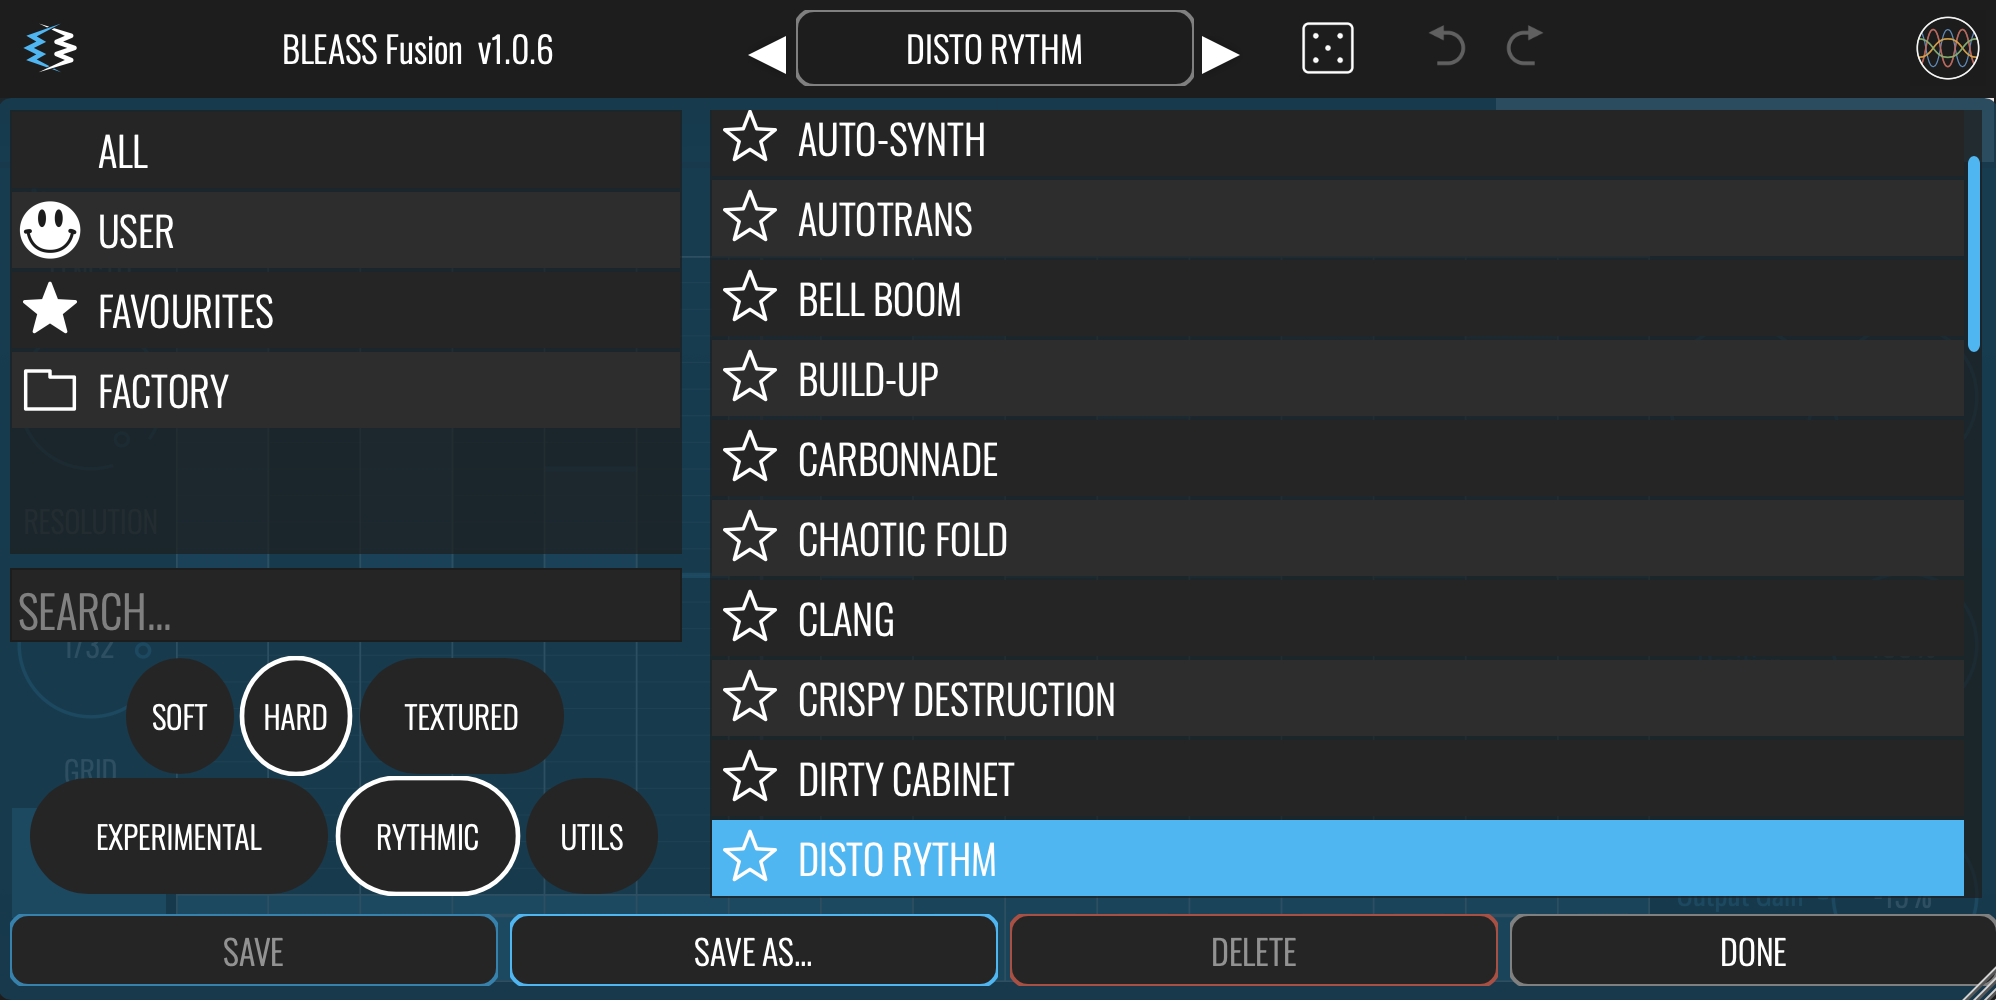
PRESET MANAGER / DICE...
Patch Library: Click the patch name to open a searchable and filterable menu of available patches, or to save your own BLEASS Fusion patch into your library. Click the left and right arrows to step back and forth through the patches.
Dice: Click the Dice icon to have Fusion create a new patch for you. The process has been carefully tuned to ensure useful and useable results.
Undo / Redo: Accidentally modified the wrong parameter? Not sure if you like the changes you’ve made? No problem! Just use Fusion’s undo and redo buttons to step back and forth through your changes.
BLEASS Logo: Click the logo to be taken directly to the BLEASS website!
BUY NOW
Also available for iOS
![]()
TUTORIALS & REVIEWS: