
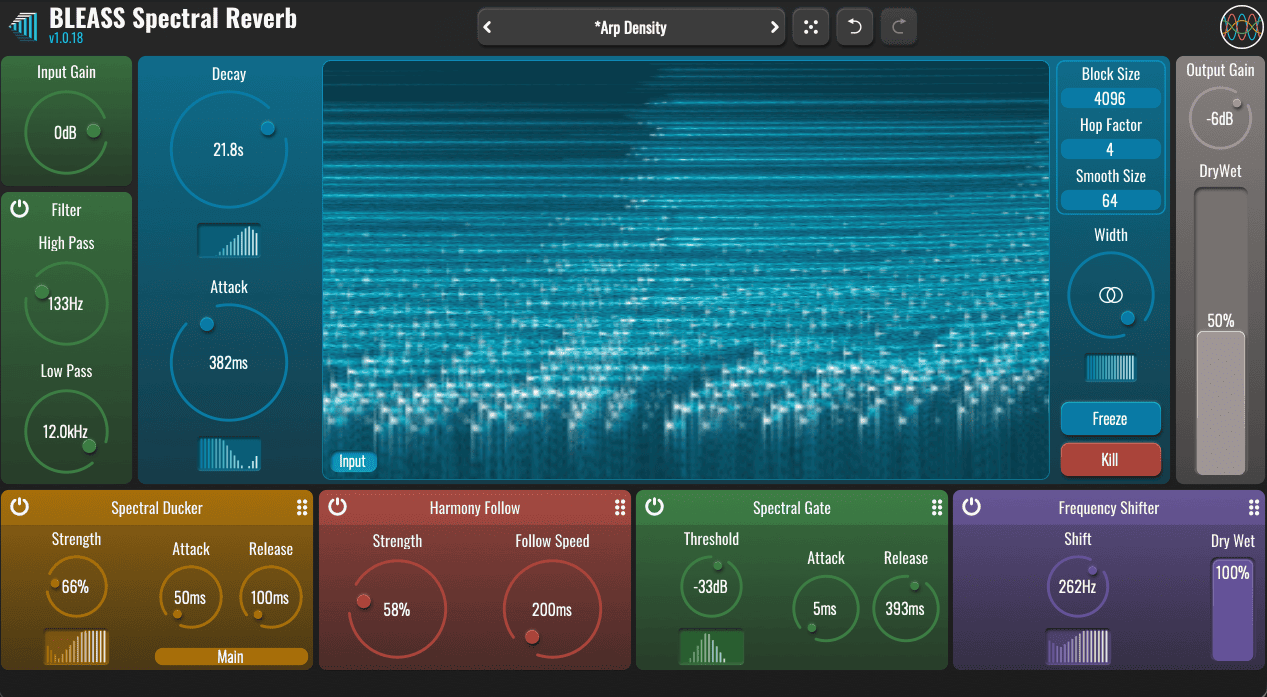
BLEASS Spectral Reverb unlocks new realms of reverberation and ambience effects, conjuring unique and dramatic sonic vistas in which to stage your music’s instruments and parts.
The secret to Spectral Reverb’s deep creativity lies in its ability to vary the spectral – or frequency – response of many aspects of the reverb sound. For example, the reverb’s Attack and Decay times can each be made to be shorter at lower frequencies and longer at higher frequencies, or the stereo width can be made wider around a specific frequency and narrower below and above that frequency.
Configuring this spectral shaping couldn’t be easier thanks to our innovative Spectral Map controls. With the swipe of the mouse/finger, Spectral Maps create anything from smooth ramps to increasingly focussed peaks or troughs, and these then work in tandem with the familiar rotary control associated with the parameter.
Spectral shaping can be taken even further thanks to Spectral Reverb’s four processing slots that can host any of six specially designed spectral processors. Many of these processors feature their own Spectral Map with which to tint and shade the reverb’s spectrum, and all add their own distinct and vibrant sonic palette to the reverb effect.
BLEASS Spectral Reverb fully supports external sidechains, and exposes the majority of its parameters as destinations for your DAW’s automation and/or modulators, all of which unlocks an extraordinary wealth of creative possibilities.
BLEASS’ efficient spectral processing engine delivers pristine reverb quality without placing a heavy burden on your system, but when you need a dirtier, gnarlier reverb, just dial-down the engine’s processing settings and revel in the uniquely characterful results.
Few reverb effects are as mouldable and versatile as BLEASS Spectral Reverb, and few make it so easy to shape a reverb to perfectly match your parts and tracks.
SPECTRAL MAPS CONTROLS
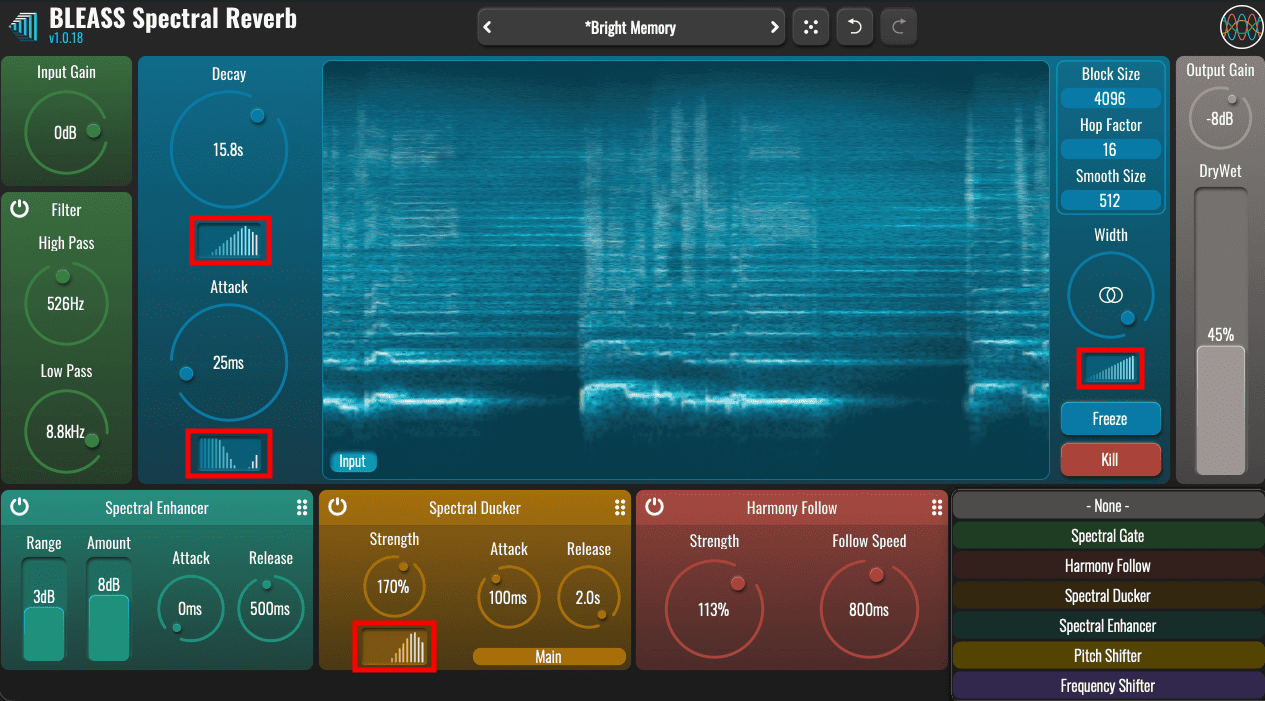
The Spectral Map controls found in BLEASS Spectral Reverb are used to shape the spectral/frequency response of the accompanying parameter. The shaping curve is represented by a series of vertical bars.
Dragging horizontally on a Spectral Map adjusts the peak/focus point of the spectrum. To create a ramp across the entire spectrum, drag to the far left or right of the Spectral Map.
Dragging vertically adjusts the curve of the Spectral Map. Dragging upwards creates an ever-sharper peak; dragging downwards creates an ever-sharper trough.
Note that, once you’ve clicked on a Spectral Map, you may need to drag outside of the control/widget in order to create the desired shape.
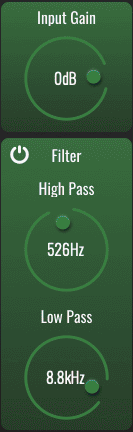
INPUT CONTROLS:
Input Gain: Controls the volume of the input signal.
High Pass Filter: Removes from the input signal any frequencies that lie below the High Pass frequency.
Low Pass Filter: Removes from the input signal any frequencies that lie above the Low Pass frequency.
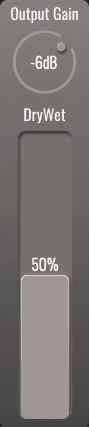
OUTPUT CONTROLS
Output Gain: Sets the master output level of the plugin.
Dry/Wet: Controls the output balance between the “dry” unprocessed signal and the “wet” reverb signal. 0% means only the dry input signal is heard; 100% means only the wet reverb signal is heard.
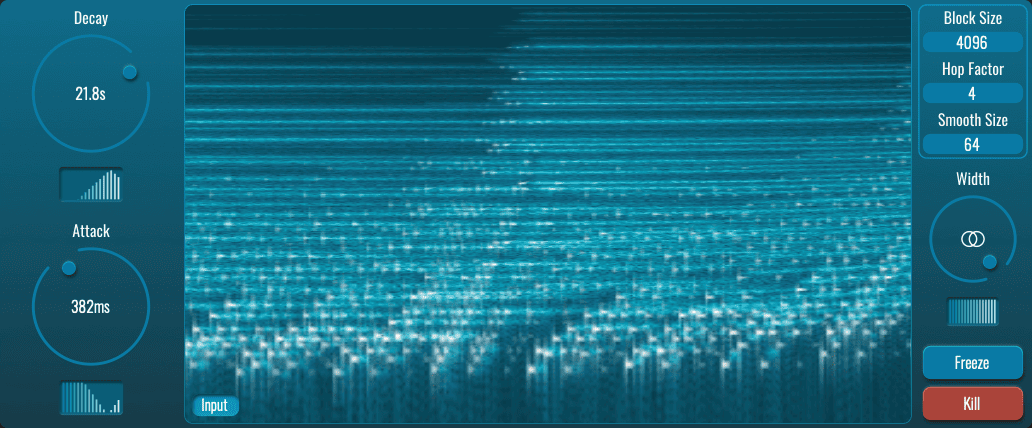
PRIMARY REVERB CONTROLS
Decay: Determines the master decay time of the reverb. Use the Spectral Map to create frequency-based variations in the decay time. The shorter a bar within the Spectral Map, the shorter the decay time around those frequencies.
Attack: Determines the attack time of the reverb. Use the Spectral Map to create frequency-based variations in the attack time. The shorter a bar within the Spectral Map, the shorter the attack time around those frequencies.
Width: Introduces small random variations between left and right channels in order to create a wider-sounding stereo field. The middle position represents no narrowing or widening; settings to the left of middle become increasingly narrow; settings to the right of middle become increasingly wide. Use the Spectral Map to create frequency-based variations in the reverb width. The shorter a bar within the Spectral Map, the narrower the width around those frequencies.
Freeze: Click the Freeze button to hold the current reverb sound and prevent the input signal from producing further reverberations. Press the button a second time to return to normal reverb generation.
Kill: Press the Kill button to immediately silence and clear the currently-sounding reverberations.
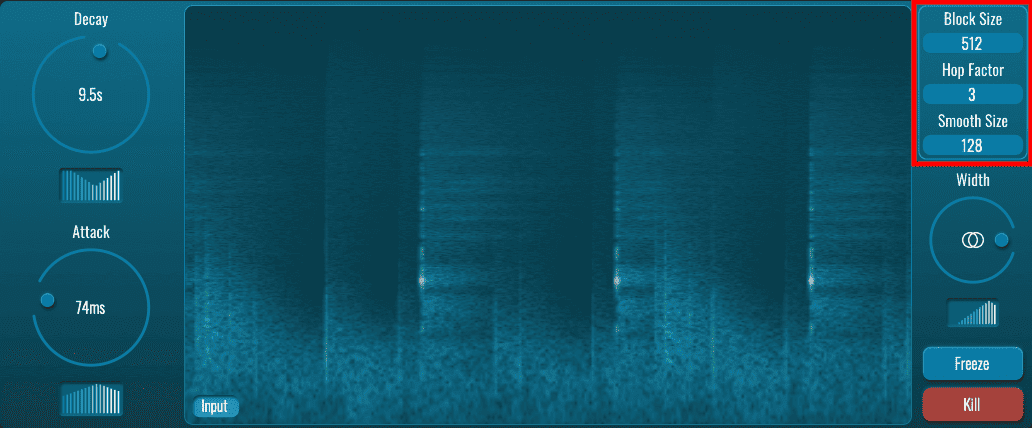
SPECTRAL PROCESSING CONFIGURATION
Block Size: BLEASS Spectral Reverb’s processing requires the incoming time-domain audio data to be converted into spectral data, which it does using the well-known FFT, or Fast Fourier Transform, signal analysis technique. FFT operates on chunks of audio, which need to be accumulated before the transform can be applied. The Block Size, then, determines the size, in samples, of these chunks. Higher Block Sizes result in greater spectral resolution and so deliver more detailed results, but also increase the plugin’s resource usage.
Hop Factor: In order to ensure smooth-sounding results, BLEASS Spectral Reverb overlaps the audio chunks that are accumulated prior to processing. The Hop Factor determines how many such overlaps are used. For example, with a Block Size of 1024 and a Hop Factor of 4, the rate at which chunks will be despatched for spectral processing is 1024 / 4 = 256 samples. Put another way, a 1024 sample chunk of audio will be sent every 256 samples, with successive chunks overlapping. Higher Hop Factors deliver smoother-sounding results, but also increase the plugin’s resource usage. Lower values give a glitchy lo-fi sound, and reduce the plugin’s resource usage.
Smooth Size: This setting determines the number of samples that will be smoothed when sample blocks are overlapped. Higher values deliver a cleaner, more precise sound; lower values give dirtier, glitchier results.
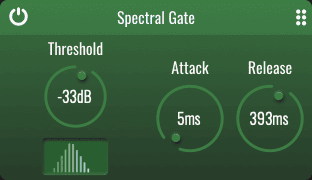
SPECTRAL GATE
The Spectral Gate cuts frequencies whose amplitude fall below the threshold.
Threshold: Sets the amplitude below which frequencies will be gated. The Spectral Map creates frequency variations in the threshold, with the shape of the Spectral Map representing the threshold at different frequencies. A higher bar in the Spectral Map represents a higher threshold than a lower one, and so those frequencies are more likely to be gated than frequencies with a lower threshold.
Attack: Determines how rapidly the gate becomes fully open for frequencies that exceed the threshold.
Release: Determines the speed with which an open gate closes when frequencies fall back below the threshold.
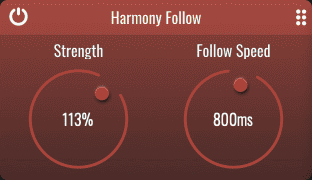
HARMONY FOLLOW
Harmony Follow allows the reverb to stay focussed on the pitch of the input signal by reducing the reverb tails associated with previously-played pitches. It does this by compressing all frequencies within the reverb and then boosting those frequencies that match the spectrum of the incoming signal.
For example, imagine applying a long reverb to a series of sustained notes. As you move from one note to another, the reverb tail of the previous note(s) may clash with the new note you’re playing. Harmony Follow remedies this by reducing the prominence of those previous note tails while maintaining the prominence of the reverb being generated by the currently-played note.
Strength: Determines both the strength of compression and spectrum-specific enhancement that will be applied.
Follow Speed: Controls how quickly the processor reacts to changes in the incoming signal.
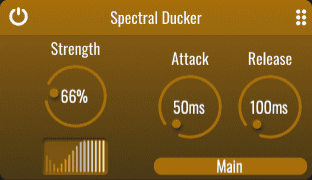
SPECTRAL DUCKER
This processor analyses the spectrum of the incoming signal and then reduces or removes that spectrum from the resulting reverb. This can be useful to ensure the direct signal doesn’t get lost within the reverb sound, even when using prominent and/or long reverbs.
Strength: Determines the strength of amplitude reduction that will be applied to ducked frequencies. The Spectral Map can be used to alter the strength at different frequencies. The lower a bar within the Spectral Map, the lower the ducking strength will be at the frequencies represented by that bar.
Attack: Determines the time taken for the processor to move from no ducking to full-strength ducking.
Release: Determines the time taken for the processor to return to no ducking.
Source Selection (Main / Sidechain): Selects whether the processor analyses the main input signal or a sidechain signal (that is, a signal sourced from another track or part within your mix) when determining the spectrum to reduce/remove from the reverb.
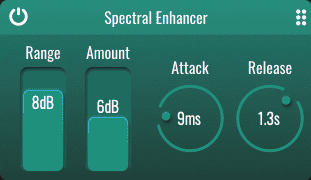
SPECTRAL ENHANCER
The Spectral Enhancer detects the loudest frequency within the signal, and then selects and boosts all frequencies whose amplitude lies within a chosen range of this loudest amplitude. For example, if the loudest frequency has an amplitude of x, and the Range value is set to r, the processor will boost all frequencies whose amplitude lies between x-r and x.
Range: Determines the amplitude range that will be used when selecting which frequencies to boost.
Amount: Determines the amount of gain that will be applied to all frequencies falling within the amplitude range.
Attack: Controls the time taken for the amplitude boost to reach the full amount.
Release: Controls the time taken for the amplitude boost to be reduced when the amplitude range changes in response to a pitch or timbral change within the signal.
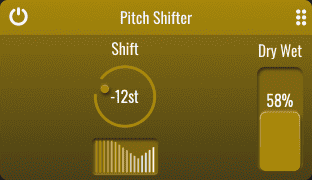
PITCH SHIFTER
The Pitch Shifter modifies the pitch of the reverb signal. The process is applied in the spectral domain and so avoids the phase shifting and other artefacts associated with conventional pitch shifting.
Shift: Sets the amount of pitch shift to apply to the reverb, in semitones. The Spectral Map modifies the amount of pitch shifting that’s applied at different frequencies. The full Shift amount is applied where a bar in the Spectral Map is at its highest position, and reduces where a bar is lower.
Dry/Wet: Balances the wet pitch-shifted reverb with the dry non-shifted reverb.
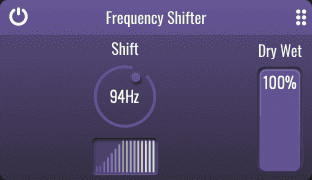
FREQUENCY SHIFTER
The Frequency Shifter modifies the frequencies within the reverb signal. The process is applied in the spectral domain and so avoids the phase shifting and other artefacts associated with conventional frequency shifting.
Shift: Sets the amount of frequency shift to apply to the reverb, in Hertz and Kilohertz. The Spectral Map modifies the amount of frequency shifting that’s applied at different frequencies. The full Shift amount is applied where a bar in the Spectral Map is at its highest position, and reduces where a bar is lower.
Dry/Wet: Balances the wet frequency-shifted reverb with the dry non-shifted reverb.

TUTORIALS & REVIEWS: